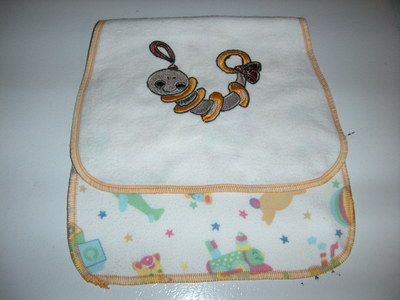
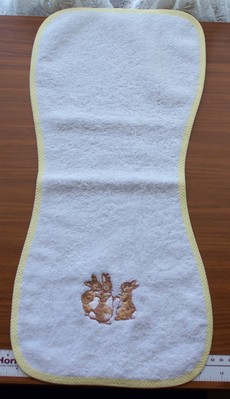
my first burp cloth ,I will get 6 out of a $6 towel ,I also have a question , how do you do the outside of the cloth I turned this one through , than I thought maybe I should do a binding ,Also do you put flannel on the back ?What do you think?
Thanks for all you help girls ,I have done another 4 , now Im looking for some good designs to put on the rest , maybe some with sayings
I've made several of these. I did mine similar to this shape. i used flannel (repurposed baby receiving blankets) for both sides one blank so I could put on a design and the other side a print and then I was going to put binding around but wanted the edge to stay nice and even so decided to serge the edge - I used a contrasting thread and when I got done I liked it and thought it looked good and decided to leave it like that and did others the same way. I also made them in two different lengths. It looks like mine are the same shape as killiecrankie's.
Good luck whatever you decide.
I have never made one of these either, but I love what you have done. Keep them coming as I am sure a lot will be needed. Hugs Shirley
Looks great as it is. With binding it will make it thicker around the edges and take longer to dry. You have done a lovely job on this.
Well done Monika! I use flannel as it is absorbent but then so is your toweling so the sky is the limit. Binding is a cute option but it is whatever you like to do, this is cute without too!~hugs~
Great job, Monika..I love it...I think I would do it the same way you have...easier than binding, too!
There are so many ways to make the burp towels, but two layers are good, the edges can be to your own taste. Yours is adorable and will do the job perfectly. :)
I have to start making baby things again and I was wondering about the burp cloths. Couldn't you just serge the edges?
Thank you.
1 comment
 by aussiequilter
05 May 2015
yes that's a good Idea too ,they would certainly be good enough for home
I make lots of burp cloths. The flannel helps catch the "juicy burps!" I always have at least 2 layers. Much easier to do it your way, but sometimes I just sew the layers wrong sides together...then clip all around the edge to make it "raggy". Those are easy also. They dry quick enough in the dryer with all the other baby things. This is adorable & I love the little design!!
1 comment
Adorable and functional at the same time......great project...love the flannel lining.......
I make my own 3/4wide bias binding using a clover 18mm tape maker.I think Spotlight has them,mine came from Punch with Judy about 15 yrs ago.I buy a square of poly poplin ,cut the bias strips with a rotary cutter ,make the the binding ,press it in half,sew it around the edge using a feather stitch. See photo below
4 comments
 by aussiequilter
05 May 2015
very nice ,I have a 1" bias maker , do you line the back ,I love the little bunnies
 by killiecrankie
06 May 2015
No ,like you I have bought bath towels without the fancy
stripe bands near the ends to cut up & they are fairly thick.The bunnies are from Beatrix Potters Peter Rabbit.
I have never made one, Monika, but if I did I would copy yours. It's just right. Chris is correct, extra work for no reason.
I like the way you've done it here Monika. It's nice to have a soft side as well as the towelling. Putting a binding on it only makes for more work! Love Chris
1 comment
 by aussiequilter
05 May 2015
I did think it would take longer to dry as well ,,Im sure they will only look this cute for a short while ,and she will need quiet a few I would think,Thanks Chris
You do it exactly like you did it .very nice .You can use the same material as front or do flannel .
This if the pattern that I use. I have never used the towels, always flannel on both sides - one side plain for embroidery and the other side printed. After turning I slip stitch the opening closed by hand and then do the 1/4 inch stitching around the outside edge. Looks like you have done the same. Cute design. I usually put a saying on the plain side.
Just cut out my fabric to refurbish my supply for the fall craft sales.
Great job!!
1 comment
I have never done one of these yet *** i just look lol
Great job hugs
2 comments
 by aussiequilter
04 May 2015
we haven't had a baby in our family for some time , I wasn't sure what mummys use these days
Carolyn, Just use a white hand towel if you have any left! I stitch mine on a birdseye cotton diaper - they even make them in colors now. (JoAnn's Fabric in USA - Gerber product I think.)
Very nicely done! I think what you have done is good. Stitching around the edge holds the two layers together!


