





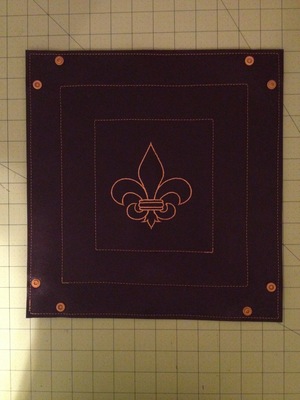
Hello Cuties- I will try to explain how I made the Valet Tray for those who were wanting to know.
I used my walking foot on my regular sewing machine and also my little Wonder clips, by Clover, to hold vinyl together as you cannot pin.
*I cut two pieces of vinyl 11 inches square. I marked my center for my design with a chalk.
*I 'floated' the vinyl on top of the tearaway, making sure my vinyl stayed centered and straight with the hoop to embroider.
*Remove from stabilizer after embroidery complete.
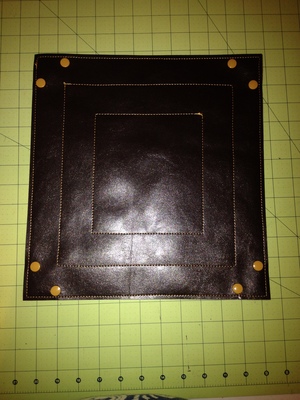
* I then marked with chalk again 1 1/2 inch away from the outer edges, all the way around. Then I marked the inner square 1 inch away from that mark, all the way around. (OR 2 1/2 inch from outer edge, if that makes more sense to you)
*Place vinyl WRONG sides together and use Wonder Clips to hold edges and corners even.
* Stitch with a lengthened stitch, my machine I set to 3.5 or 4 stitch length. Start at the inner square mark, by back stitching, at beginning and end.
*Stitch middle square and then the last, outer edge, keeping your stitching straight on mark, being sure to always back stitch 2 or 3 stitches, at beginning and ending.
* attach Kam Snaps as shown below
A word of caution though- I don't think it would be advisable to stitch a very dense design. I worried about it perforating and the vinyl coming out around the design area. I'm not sure how to explain what I mean, but maybe you can understand.
* Also, using these instructions anyone can make these any size, too and you don't have to have a large embroidery hoop field. The design I use is 4 inch square.
Good luck with your tray and ask if you need to know anything I may have forgotten to include.-Toogie


No joke, you saved me here for the men a gift.Thank you

