






Oh dear, I'm not having much success at stitching a design on a T-shirt. For some reason I've just never embroidered on a knit! I've ironed on a fusible stabilizer on the shirt, hooped no-show-mesh and then pinned the stabilized T-shirt on the mesh. The picture shows my first colour and it's already beginning to buckle. I read somewhere that you should never sew further than you are willing to pick out...so I stopped. This is not something for sale...just a top to go with pajama bottoms I made for my grandson. Sorry, the picture does not show what I'm trying to explain very well, but to the right of the needle there is a definite bump in the fabric. I think I'll get out my stitch ripper and do some "reverse" sewing while I wait for any help and suggestions. Thank goodness the stitches are quite long! Avis

Make sure the thread from the spool is not caught on anything or knocked over
Use a ball point needle
Check the bobbin. One of my machines does not like stitching some designs with a bobbin less than half full and will behave like this. I also have a black spool if thread if used in the bobbin will misbehave too
Check for thread nests. My last embroidery had a very difficult to find thread nest under the bobbin casing that pulled some fabric into the needle plate after puckering a design I knew was good to stitch
Sounds like it is well stabilised and you also have pins and basting stitches in but depending on the quality of the knit tshirt I sometimes use 2 layers of cutaway mesh with the grain sitting opposite directions
Some designs will stitch out better on knit with water soluble stabiliser on the top.
Hope these help for now so you can get back to embroidering
I had just cleaned the bobbin area and put in a new ball point needle. The bobbin was freshly filled as this was a new project so there wasn't a problem there.
I've taken the T-shirt out of the hoop and there were no nests anywhere and I'm in the process of doing my reverse stitching!
The tension looks great both top and bottom so both threads are feeding correctly. It just seems that as it stitches the fabric is being stretched and eventually ends with a bubble.
I think I'll try this on a sample piece of fabric and use a heavier iron-on stabilizer directly on the shirt before I place it in the hoop. I recently bought a sticky wash-away so maybe that could prevent the shifting.
I'll try again tomorrow and will post what happens: it will either be a success or try again!
Thanks again and be blessed, Avis


You can SLIGHTLY stretch the fabric but beware not to stretch it too much, rely on the HOOPED WSS on top to keep the fabric from buckling or bunching.
I would definitely test stitch the design onto an old t-shirt using this method before stitching it onto your garment. Good luck with it.
hugs n roses, Meganne
A lot of factors come into play before I decide which one I will use... thickness of fabric, amount of stretch, one way or two way stretch, type of embroidery design, density of embroidery design, if it has good underlay or NO underlay?
But I always use Fabric type WSS on top as, besides stabilising the fabric, it helps keep the stitches ON TOP of the fabric, instead of them sinking into it, this is especially useful when stitching text.
Over time, and with practice, you will come to instinctively know all the things to look for, that will help you decide how you will proceed. For me I ALWAYS, test stitch EVERY design on fabric as close to the garment as possible, as it helps me decide the best way to get the best result.
with stretch fabrics, if I know it is not going to be stretched tight on the wearer, I will hoop with as little stretching to the fabric as possible, even if it means measuring the design and putting pins in the fabric to show exactly how big it is, so that when I hoop it, I measure the pinned area again to make sure the fabric has not been stretched.
I have a stretch top I wear that I had to stretch out, a lot, when I embroidered it, so that so that it would look good when I wear it, but if you saw it not being worn it looks all wrinkled and puckered. :-)
Sometimes I hoop all three layers: underlying stabiliser, fabric and top stabiliser,
other times I will only hoop the bottom two and pin the top stabiliser in place, pulled tightly, taking care not to pull the fabric.
Yep, I'm really pedantic when I embroider things, and all of these hints are just little things to jot down and think about depending on how fussy you are with your embroidery, so I hope some of it helps.
Hey Vicki, I also have never run my machine at high speeds, I'd rather do a good job than a rush job. :-)
And I prefer Fabric type WSS over that horrible plastic. :)
Hugs n roses, M

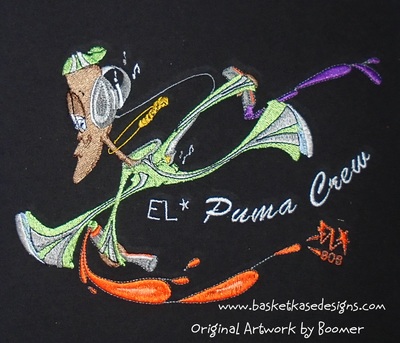
Finally, all tshirts are not the same quality. Seems like the thin tshirts are dominate now and I prefer a heavier weight tshirt and have to shop around to find one!
I like a soft feel to my tshirts, so I put two layers of iron-on mesh on the back with the second layer ironed on in the opposite direction of the first. On top, I put two layers of washaway. For the first layer of wws I just use scraps that overlay each other a small bit, but a whole sheet on the top of the scraps to hold them down. Otherwise your foot could get caught in the scraps which is a real problem. I find that putting some wss on top seems to add a tiny space so the thread tension is a little looser which helps reduce puckering. I do not use spray glue, just lay them on there. I usually do a basting box to hold everything down.
Sweatshirts are done differently, so you may need to practice on those too.