
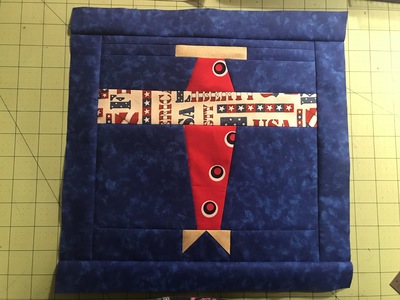
Hello Cuties, This is something I tried for the first time. It is called foundation paper piecing, to make quilt blocks or mug rugs.
I looked on google/pinterest and saw the airplanes they had. I got out my paper and pencil and since it was all just straight lines, I drew out my airplane. I think my propeller needs thinning down and I also got my fabric mixed up for the tail. I should have the background blue where the tan is and vice-versa, at the point.
Anyway, I really had to think about it, so it took my mind off other things. It's not perfect, but I enjoyed the process more than I thought I would. I just wanted to see if I could understand the how to, even though this is a more simple design. I used the dark blue to represent a night time sky for my background and also because I didn't have a lot of choice in MY fabric store-(lol-my stash).



I once drew a number of small sailing boats, for 10 cm (3.94") squares and loved getting my points so nicely done. Used up a lot of tiny scraps doing that. Nowadays I'd go for bigger squares. :) You can buy tear away printed with a 1 cm grid, but I prefer paper - so much cheaper.
Later I digitised a few mug rugs, drawing in my software program instead of on paper. Nice when you want to make a lot of identical squares (or a set of mug rugs). But for one-offs I prefer paper and pencil. And I also like using my sewing machine instead of an embroidery hoop.
Is the difficulty any different in digitizing an appliqué verses a filled design?
Appliqué is easier, you just digitise the outline/placement line set it to single stitch, copy paste and set the parameter to a small zigzag to apply it and copy paste again and set it to a satin stitch outline to finish the raw edges. No big choices to consider.
And a paper piecing design is the easiest of the three. The sewing order needs to be logical, but the stitching is just straight lines.
