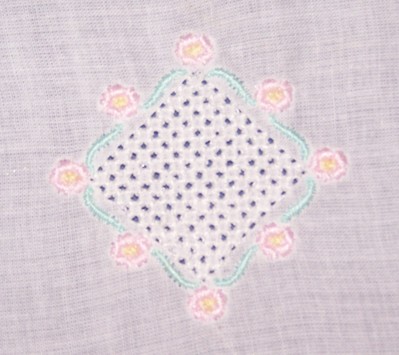







In addition to the instructions, I used the alignment and grouping tools to improve the stitch design. The wing needle portion of the design is a 1 inch (2.5 cm) square. The whole design is 2 inches (5 cm) from corner to corner. I also made 2 edited versions for using in a continuous border.
For stitching it out, Janome's instructions said to use heavily starched fabric with no stabilizer for the wing needle portion of the design, then float stabilizer underneath for the rest of the design. However, since I used a scrap of lightweight French Batiste Cotton, I had trouble without stabilizer. Hooping the fabric with 2 layers of WSS worked best. Also, when stitching the wing needle portion of the design, I had to remove the embroidery foot and slow the stitching speed.
The lesson is for DigitizerPro, however I’m sure the commands are similar in other software. So here’s the link for anyone that wants to give it a try.
http://www.janome.com/index.cfm/LearningCenter/Techniques/Software/Creating%5FFil%5FTire%5FEmbroidery