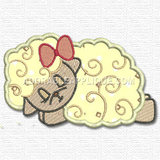
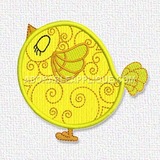
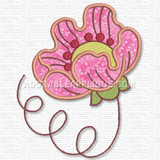






17126✽
fabric. Now I'm wondering what is the best way to stitch the trim around the edges, and stitch them together. If I just use an accent fabric to finish the block, then I have a very thin layer of fabric seperating each "puffy" quilt block. Should I just use a small bias binding then stitch the blocks together? If I do that, I won't have a nice wide edge between blocks, and...I would have to hand stitch each block together. UGH!!! This is a prime example of those projects that was not well thought out before I started stitching away!
Comments (11)

2810✽
Wish I could help you Waterlily! Since I can't I will give you a +2 flower for your wait!!!
4 comments
Thanks for the flower. I have a feeling that I'm going to have to do this the long, hard way... Which means this is a project that will never be finished. LOL!
In the quilting world Colleen, they are called UFO's (un-finished objects) - but you won't let that happen, now will you?
Love and blessings Chris
Love and blessings Chris
Thank you Chris for explaining the UFO acronym, I was too embarrassed to ask! I feel all better now!!!
You are very welcome Judy - never feel embarrassed to ask any question.
You never know someone else may want to ask a similar question. There is no such thing as a "wrong" or "silly" question.
If you don't ask, you won't learn!
Love and blessings Chris
You never know someone else may want to ask a similar question. There is no such thing as a "wrong" or "silly" question.
If you don't ask, you won't learn!
Love and blessings Chris

234573✽
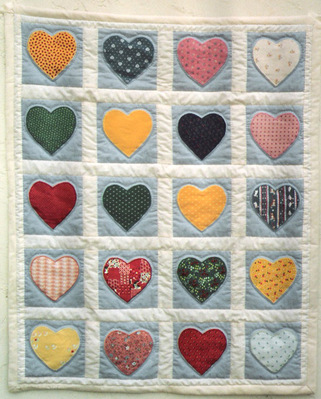
If it was me I would make a 2 and a half inch sashing (having top, batting and backing fabric altogether) then sew a square to it then add another square on the other side of the sashing
This way you would have the same thickness as the Trapunto blocks. Once you have put the blocks together with the sashing between each piece (say 4 across in a row) I would then add a long sashing strip between each row. I hope this makes sense. I know what I'm talking about, so I hope you do too. So after each row is finished you attach the piece of sashing and then add the next row etc. etc. etc. I hope this is clear!
I'll add a picture to give you an idea of what it would look like.
Love and blessings Chris
This way you would have the same thickness as the Trapunto blocks. Once you have put the blocks together with the sashing between each piece (say 4 across in a row) I would then add a long sashing strip between each row. I hope this makes sense. I know what I'm talking about, so I hope you do too. So after each row is finished you attach the piece of sashing and then add the next row etc. etc. etc. I hope this is clear!
I'll add a picture to give you an idea of what it would look like.
Love and blessings Chris
2 comments
This makes perfect sense!! Thanks so much! I'd much rather do this than have to hand stitch everything or let the project go unfinished! Thank you SOO Much!!
You are very welcome "Waterlily". I hope it all turns out well for you.
Love and blessings Chris
Love and blessings Chris

236✽
Have you considered making a rag quilt ? All you do is sew 2 blocks togethr with 1/2 or 1/4 in seam and put them together with you seams showing on the front. After that. then sew all around the quilt and then clip each block about 1/4 in apart. Then wash in the machine with an old sheet to catch the strings, and walah, your quilt is done. You can go to search and type in rag quilt and it will bring up all urls. Here is one for you. I even make mine with embroidery designs and they turn out beautiful. Rag quilts are fast and easy to make. Hope this helps.
1 links:
[1]
http://quilting.about.com/od/ragquiltpatterns/ss/rag_quilt_basic.htm
quilting.about.com
1 comment
I had thought of that, but the blocks are so pretty...I thought the rag idea would detract from them,

27382✽
With Trapunto you don't do the embroidery on the 3 layers. You embroider only on the fabric and a bit of wadding underneath. Then trim the wadding as close as you can to the stitching lines. When you have done all the blocks, then you join them with your sashing and put the borders on last. When that has been done you then lay the backing wrong side up, lay the wadding on top of that and the top of the quilt right side up on top of the wadding. Pin or tack all three layers together and quilt around the embroidery.This will make it stand out.
1 comment
Well, I suppose it would have been better if I had read the instructions more closely. LOL! This way certainly makes more sense!

145791✽
Waterlily Chris has given u a gret example of what u can do & at this point it's probably your easiest way out & will give you a lovely quilt. *
1 comment
Thanks! I will certainly be taking Chris' advice! It seems to be the best way to save the project!

158720✽
You can order a book: Reversible Quilte by Sharon Pederson and she tells exactly how to do what you are wanting to do. Go look on Amazon and see if they have a used one that is cheap. Wish I could explain it here, but it is a Book. Doesn't look terribly complicated.;)
1 comment
Thank You! I will go to check that out!
7261✽
by
nonmusicmom
15 Sep 2009
+6✽
If it was mine I would use the process of cutting yous sashing stripes back fabric 1 inch wider than the top sashing strip then cut batting strips 1/2 in smaller than your top shashinf fabris. Takr the strips and sew a simple quilting stitch down the center to hold in place. Then sew the strips on at the back first now you will have a longer piecee of the backing facric at the front and you turn it down and over your raw edges ans then stitch it down in the ditch. Hope this helps.
1 comment
I had thought of something along those lines, but your idea actually seems to be much better.

2182✽
by
sandynavas
15 Sep 2009
+7✽
Thanks, waterlily. I don't know if these answers truly helped you, but they did solve a problem for me. Thanks so much for asking.
1 comment
Well, I'm glad it helped you! I still have to finish reading responses, and maybe It will cure my problem as well.

211088✽
by
shirlener88
15 Sep 2009
+5✽
Colleen, thanks for asking this question - hope it helped you - it gave me some idea's. *4U

1 comment
You are more than welcome. I did get teh solution to my problem, as well YIPEE!! Now that I know what to do...I sure hope I finish this project!

27608✽
you asked and we all got some good answers out of it. Here is a flower for all

33451✽
by
marjialexa
16 Sep 2009
+2✽
Waterlily, what you've done is essentially what the Hoopsisters teach, how to quilt all the blocks and then put them together with narrow sashing. They have whole classes on this technique, where it's all done in the hoop, making crazy quilts, compass rose, all sorts!! Go to Hoopsisters.com for more information, I think they have photos of how they put it together (or else that's on their Yahoo Group, duh) and there are a couple of in the hoop blocks to download free to try the technique. They're coming here to our dealer for a weekend seminar, I think this coming weekend. Hugs, Marji
1 comment
Thanks so much Marji!! I'm on my way to thier website to check it out!