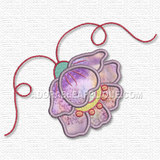








Easter Sunday, while showing off one of my owl purses to an Aunt, she asked if I had ever seen a placemat purse. I was aware of them and after reasearching a few designs, I decided to use the placemat that I had sitting in my stash and simply "get to it"!! This purse I've posted was done last night, it's #8 in the last 10 days! I knew that I wanted mine to be lined, have non-purchased handles (to keep expense down) and to be very simply made. This is what I came up with...and I am VERY HAPPY! I've been gearing up for a small spring show that's coming up in a few weeks...I'd like about 12 of these made for that show. You crafty ladies out there, will look at this and see just how simple it is to make! One placemat, one piece of stash coordinating fabric, cut just a little longer than the placemat and the handles, band and closure cut from a medium/heavy weight twill fabric. It goes together in a flash! The placemat cost me $1.50...the design is from Embroiderylibrary. Well...what do you think???


MINI TUTORIAL FOR MY PLACEMAT PURSE
1. Embroider placemat. Any placemat that you can embroider on should work. I prefer one with a little bit of “body” to it.
2. Using placemat for pattern, cut your lining fabric. Cut this exactly the width of the placemat, but make it about 3 inches longer.
3. Right sides together, sew placemat side seams. If there is a finished hem, I like to sew the seam right at the edge of the hem, making the hem the width of your seam. Overall, I like to have a pretty wide side seam…maybe even up to 1 inch wide, as this give structure to your sides of the purse. Press side seams, and then pinch together the bottom to form a square edge. (I don’t know if I can describe this correctly…but you need to make like a triangle at the bottom of the seam and then sew straight across about 1 ½ inches from the point of that triangle. Cut across the straight sewing seam and when flipped right side out, it will form a box like square edge). Turn your placemat right sides out and press the seams again. You might want to zig zag the top of this side seam right along the top of the purse edge, just making it lay flatter for you.
4. With your lining fabric, sew EXACTLY like above, taking EXACLTY the same seam allowances and making the boxed corners. Without turning right side out, press the side seams. THEN…INSERT this down into the embroidered placemat, turning your extra over the front of the placemat edge. This will give you that little bit of lining that shows from the front/outside of the purse.
5. Straps. I cut a piece of twill fabric, 4 ½ inches wide and 34 inches long. On your ironing board, press about 1/3 of the width to the inside of the strap. Then press the remaining 2/3rds of the other edge toward the middle of the strap. THEN fold this in half…press good and topstitch both edges about ¼ inch from each side. Cut in half, making 2 17inch handles. Set aside.
6. Front band. Cut a strip of twill 2 ½ inches wide and a little more than twice the width of your bag. Press about ½ inch on both sides toward center of strip. Set aside. (Will look kinda like a wide piece of bias tape.)
7. Closure piece. Cut a strip of twill 9 inches long by about 2 inches wide. Press both edges toward center, meeting in the middle. Then double over and press flat. Top stitch about ¼ inch along open edge. Set aside.
8. To assemble: Making sure that your lining is somewhat even, and over the front of the purse about 1 or 1 ½ inches, pin on your handles to your lining…I put the raw edge of handles to the raw edge of lining, spacing even, both front and back. On the back, centered between the two back handles, fold the 9 inch closure in half, with raw edges meeting raw edge of your lining…and the loop end of the closure sticking up. Pin good. Now you should have your handles, and closure pinned to your purse, through both the lining and front of purse. Starting at one side, and about ½ inch or a little more down from the top of the purse (so some of your lining will show, take your band…and lay it across the purse…positioning it over the ends of the handles and closure end. These ends will be approximately in the middle of the band once it is sewn. I then topstitch this on…just eyeballing it so the band is even all the way around and an equal amount of the lining is showing near the top of the purse. Topstitch both the top and bottom of the band. When I get to the points where they join, I turn under about ¼ or ½ inch to make it look neat.
9. Closure finishing. About halfway down the closure, I sew straight across a couple times and then do a wide and close zig zag/applique stitch straight across. This divides the closure into two sections and makes it easier to button.
10. Sew on button!


