









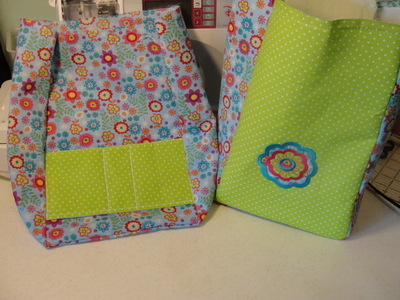
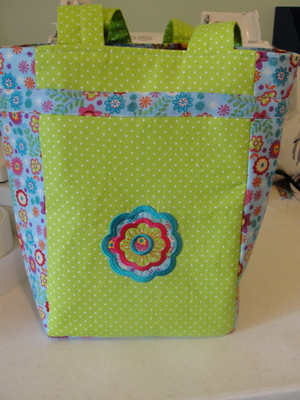
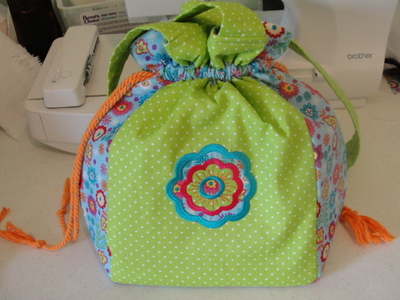
For Bonnetgirl or any other Cutie interested in the measurements, in inches, of the bag I posted in Projects. This is like the bag futte made, and she has some cm measurements, with her post in Projects.For center fabric (pic is green)to emb on-cut 2pcs= 8 1/2" x 12 1/2" for front and back,using same green fabric, cut 2 straps/handles 4" x 25 1/2" (can make length according to taste) You can also make some inside pockets, for your lining, with this green fabric, see my photos in Projects,there are about 6 pics....Now, using print fabric cut 2pcs (use 1 for sides and bottom of bag )and 1 for (bag LINING sides and bottom)= 6" x 34". Also, cut 2 center pcs, of print, same size as emb pcs 8 1/2" x 12 1/2", this is for LINING front and back. Cut 2 pcs for casings, for drawstrings.You can measure this when you have it altogether. I didn't write it down and I cut mine on the straight grain.I think,BUT DON"T CUT UNTIL YOU MEASURE YOUR BAG !,I think I cut mine 1 1/2"x15". Each one goes, from the middle of 1 side, across bag, to the middle of the other side, for your cord to run through.I took all 3/8" seams and I sewed cut-a-way stabilizer on my green front & back, only 1 side&bottom,and on the 2 handles, for body stiffness.(Used my serger)Please look back at my photos or if you need more info, just ask-#1 emb #2 sew r-s-t, side and bottom to front, then to back . #3 sew pockets if U made any, onto front and onto bk linings. #4 sew S&B to front lining, then to back lining. #5 sew cut a way down the center of your flat 4" straphandles.#6 now sew like a tube,R-S-Together. turn #7 Mark 3" down,from raw top edge of green fnt/bk /sides, this is for casing,later.#8 Place and sew handles on green fnt & bk. I placed mine 3/4" from side seams #9 R-S-T starting just b/4 a side seam,sew across side seam, front,one side,bk and just over the other side seam stopping, leaving an opening to turn. #10 turn and topstitch close to top edge, closing opening.#11 Iron your casing strip, turning so the long raw edges meet in the middle.#12 Starting at center of 1 side (not the seam, the center) sew casing, placing strip above line U marked earlier, through all thicknesses. #13 Run cording, starting at 1 side,all way around.now run 2nd cord from other side all way around. #14 Pull cord to close your finished bag!





Super bag and look forward to trying and making one


