






Community / Personal /
360671
by noah 12 May 2014 ( edited May 15'14 07:09 )
+41

I will try to show you how i did my angel quilt. I don't know how much i can load here so it may take two uploads ok

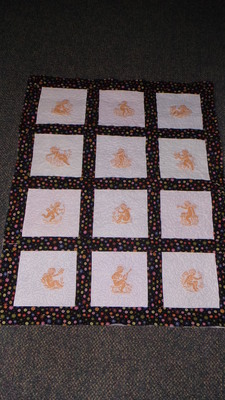
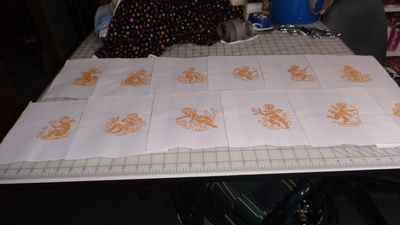
#1 Sew your blocks in whatever designs you like .Mine are 8x8
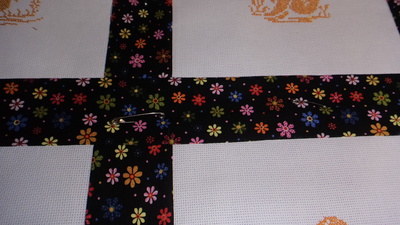
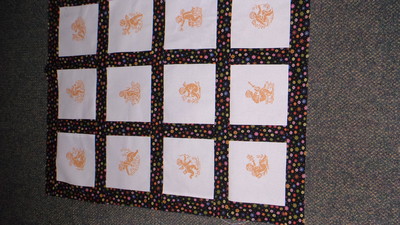
#2 sew block together i use 2.5 inches fabric between
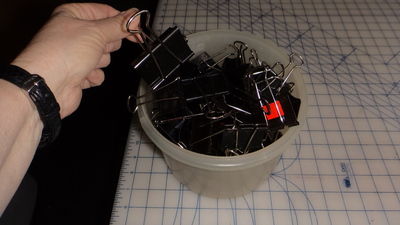
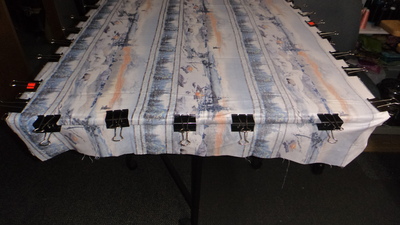
#3-Now i have 4 tables with leaves that open up to your size of quilt . #4 Lay backing face down and clamp it to the table.
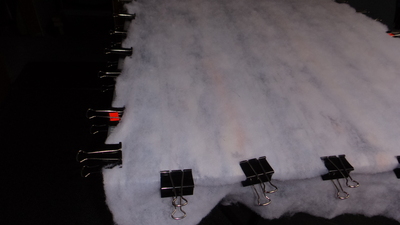
#5 Lay batting on top of that re -clamp
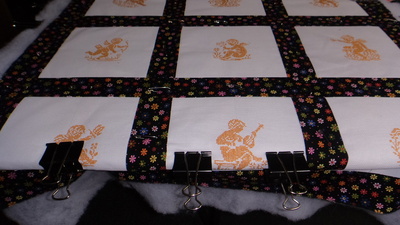
#6 Add your top .re-clamp
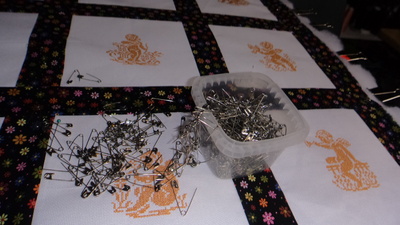
#7 Pin your quilt with many pins .Go through all layers to hold it in place
#8 I am showing pins (u can't See it very well)
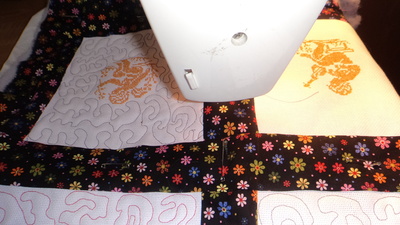
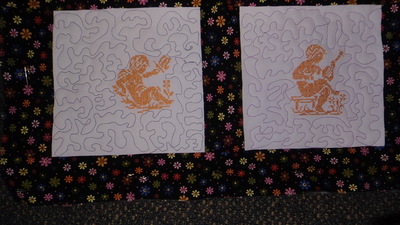
#9 Quilt however you want,i Quilted angels and left stripes unquilted ,this time!!!Each quilt is different
#10 showing quilting
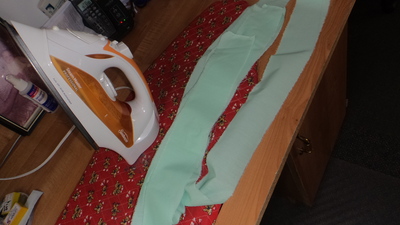
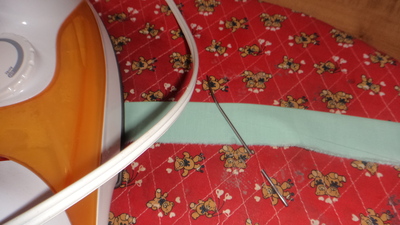
#11 Make your border .cut 2.5 inch pieces and sew together .Then press
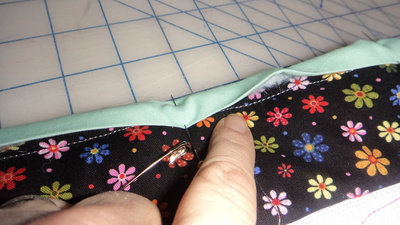
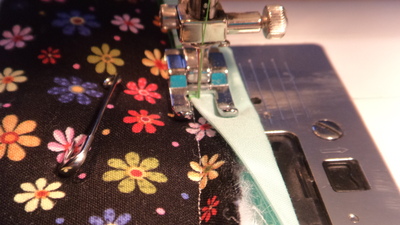
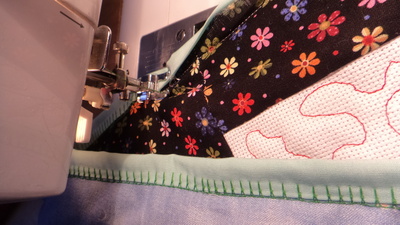
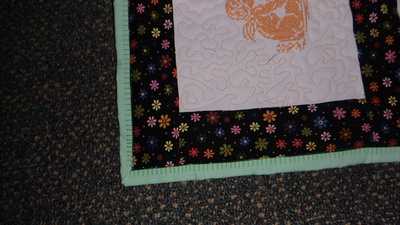
#12 I sew border on back of quilt then turn to front so i can do any fancy stitch on my machine#13 I turn over to front and pin a little but i use my eye and put the back right on the sewing line .(i am pointing to it)keeps it straight.
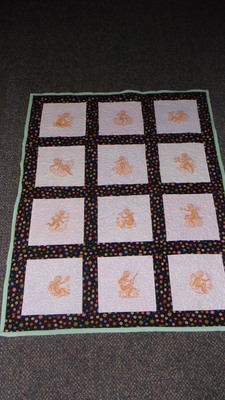
#13 Finished:):)Hope this is clear i am not good at explaining myself Hugs
18 images:
[1]
[2]
[3]
[4]
[5]
[6]
[7]
[8]
[9]
[10]
[11]
[12]
[13]
[14]
[15]
[16]
[17]
[18]
Comments (24)
140717
by spendlove 12 May 2014
+5
Great use of those bulldog clips!
Thanks for taking all those pictures.
1 comment
by noah 12 May 2014
your welcome i hope it helps someone:):)
57801
by edithfarminer 12 May 2014
+5
super pictures thanks. Like the clips. biggest hurdle for me is the freehand quilting. Have tried and made a mess of it. Must try again, yours is fantastic!
1 comment
by noah 12 May 2014
i love it and have used it lots hugs
86901
by highlandermom 12 May 2014
+3
Great job on your layout instructions and like your pictures with your words. You put it well together. Now he,he..... big question. I have "a" table like you have showing here. You mentioned four lol here is question how do I make room for four or talk man into it?
1 comment
by noah 12 May 2014
i got a large piece of shelving with nice finish ,can;t remember what you call (melmine)and then John cut it in half ,so if i need bigger i got it .I bought folding legs for it to store it easy :):)
26010
by elemausi 12 May 2014
+3
Thank you for showing us your pictures and the description.
1 comment
by noah 12 May 2014
your welcome hugs
173695
by cfidl 12 May 2014
+3
Excellent! Thank you for the information and pics! I can follow it!
1 comment
by noah 12 May 2014
oh great thanks glad you can understand it hugs
8037
by anssmile 12 May 2014
+5
Thank you! This is a very clear tutorial, I understand it. I have not done a quilt before because I did not know how. Now I can try to make own. Thank you very much! Now to find somewhere to lay it flat that is thin enough that I can clip things on it.... My sewing table is in storage....
1 comment
by noah 12 May 2014
thanks for looking hugs
24424
by chenille 12 May 2014
+5
Thanks so much! Excellent directions and a lovely quilt!
Hugs, Nadyne
1 comment
by noah 12 May 2014
Your welcome hope it helps hugs
6069
by jen15957 12 May 2014
+6
Thank you For taking the time to show us how it's done. The instructions are clear and the pic are so clear and helpful. jen
1 comment
by noah 12 May 2014
oh so glad you can understand them .I am not good with words hugs
261163
by basketkase 12 May 2014
+5
Carolyn, thank you for this amazing tutorial....it makes me think that I could follow these directions and actually succeed with a quilt.....am printing these out!!
1 comment
by noah 12 May 2014
oh so glad i could help if you need more help write me lol hugs
21543
by susiesembroidery 12 May 2014
+5
Wow!! What a superb way you have shown me to do my quilt. I am busy with a butterfly quilt and this will really help me to finish it off nicely. Your quilt looks beautiful!! Thank you so much for this tutorial.
1 comment
by noah 12 May 2014
your very welcome hugs
136
by maricruzpacheco 12 May 2014
+5
Que maravillosos foto tutorial. Muchisimas gracias!
1 comment
by noah 12 May 2014
your welcome hugs
299559
by pldc 12 May 2014
+4
awesome!
1 comment
by noah 12 May 2014
Thanks hugs
60484
by mariahail 12 May 2014
+4
all I can say is WOW!!!!
1 comment
by noah 12 May 2014
Thanks hugs
8217
by pacmp 12 May 2014
+4
Great Tutorial, pictures related to each step, easy to remember and steps were clear and concise.

I hope people also paid attention to your great helpful trick while you were ironing the the bias strip in half and having the long needle pinned down so the material slid under the needle. This is great for several reasons, it helped serve as another hand helping to keep the material folded, saves you from needing to pin any of the length, it also kept the material from sliding or falling off the ironing board prior to getting to that area and also keeps your hands away from the hot iron.
Thank You again.
1 comment
by noah 12 May 2014
yes you got it i couldn't write all that lol hugs
38558
by blueeyedblonde 12 May 2014
+4
Great job both in doing the quilt and the tutorial.
1 comment
by noah 12 May 2014
thanks hugs
16707
by tilde01 12 May 2014
+3
Great tutortial, especially with the pics. The pics make it all understandable. Unfortunately, I don't have room for a table(s) like you have. Oh for a bigger studio. *4all.
1 comment
by noah 12 May 2014
thanks hugs
11271
by pcteddyb 12 May 2014
+3
Great job explaining all of the steps - you may just make some new quilters out of this!
1 comment
by noah 12 May 2014
i do hope sew hugs
1208
by virginiagran 12 May 2014
+3
Nice job
1 comment
by noah 13 May 2014
Thanks hugs
25546
by kezza2sew 13 May 2014
+2
great tutorial for all who may need this help. Fantastic idea all round..
thanks for sharing your tips here....
1 comment
by noah 13 May 2014
your welcome hugs
35301
by Leaha 13 May 2014
+2
Wow, I have read this multiple times and I think it makes an excellent tutorial, not sure but what I could even make a quilt from following this. It turned out beautifully, I love the 2.5 inch border fabric on the part by the angels. I plan on doing like Ms. Vicki and saving this as a working reference. Thanks for sharing. :) hugs to you Leaha
1 comment
by noah 13 May 2014
your very welcome i just hope it helps others :):)
11867
by marfa 14 May 2014
+2
Excellent result!
1 comment
by noah 15 May 2014
Thanks for Looking hugs
23282
by sewilso 15 May 2014
+1
Thank you for explaining this Carolyn. You work so hard and stay so busy, you are an inspiration to us all! I appreciate it!
1 comment
by noah 15 May 2014
Your very welcome hugs
30988
by justsew 15 May 2014
+1
Thank you Carolyn,for taking time to help us with quilting.can i ask, have you free motion quilted, it all looks easy, but i know it is not .
hugs Pam.
1 comment
by noah 15 May 2014
yes i did free motion quilted it thanks hugs
234507
by pennifold 15 May 2014
+2
Well done Carolyn, great instructions and lovely to see the quilt finished. Love Chris
1 comment
by noah 15 May 2014
Well hello and thank-you :):)hugs