







122866✽
Finally finished my machine organiser, it isn't as beautiful as the one my Secret Sister made for me, but it will still serve a useful purpose.
Cat design is from the Chinese website, Punk Raggedy & Scissors are from Urban Threads and the Needle & Thimble design I'm not sure but it is titled CWsewing_005.
I stitched the scissors and thimble designs using metallic threads as I love the effect, I think Tao likes it too.
Thanks for peaking. hugs n roses, Meganne
5 images:
[1]

[2]

[3]

[4]

[5]

Comments (38)

261163✽
by
basketkase
18 Aug 2014
+12✽
Love it, Meg and so does Tao......that is Tao, right? He has gotten so big!!
3 comments
Yes Vicki, he is a very large cat and still only 10 months old.
Tiddles is really petite, only half the size Tao was at six months.
Tiddles is really petite, only half the size Tao was at six months.
Que bonitos bordados, ¡Felicidades!

Beautiful job, Meg.Great colors.

11867✽
So pretty and well done
1 comment
Thank you

148939✽

42046✽
Clever you , Love the designs Well done BBF :)
1 comment
Thanks BBF
1223✽
by
nonna57sdaughter1
18 Aug 2014
+10✽
Very creative. If i let my cat in the craft room, i would have white fur from her and black fur from the other 2 through everything!!, and its hard to get out of fabric!!! Cute though!
1 comment
Thanks Julie. The other kitten was jumping up on my lap all afternoon making it very difficult to sew but at least he doesn't climb on the tables like Tao does. All my fabric is safely locked away so at least they can only get fur on the project I'm working on. :-)
23577✽
It's lovely! I really like the design of the cat on the sewing machine. Very nicely done!
1 comment
Thank you. I've been wanting to stitch out that design ever since I first saw it, but then I also love the punk Raggedy. :-)

54619✽
57807✽
by
edithfarminer
18 Aug 2014
+8✽
Looks super handy to me Meganne and love your designs on it too.
1 comment
Thanks Edith. After using my Secret Sister's gift I couldn't wait to make some for my other machines, they are so handy.
78119✽
That's a beautiful organiser, Meganne, great designs, especially the cat on the sewing machine.
Hugs, Lidia
Hugs, Lidia
1 comment
Thanks Lidia. Tha design kinda looks like a photo I have of Tao

145791✽
I've gotta make me one of these Meg. I especially like the measuring tape right there when you always need it. Great job and I do love your Kitty Cat.
1 comment
:-) Thanks so much, my kitties are very special to me.
7584✽
This is a clever idea, thank you for sharing.
1 comment
Thank you, they are so useful.
26010✽
Like this organizer, great designs, well done.
1 comment
Thank you.

255066✽
Beautiful work Meganne and so useful.
1 comment
Thanks Sarah, a definite must have. :-)
6024✽
Beautiful work...........
2 comments
Thank you, it was fun to make.
Hehehehe...'I'll just rest my head here'...cute!😻
122866✽
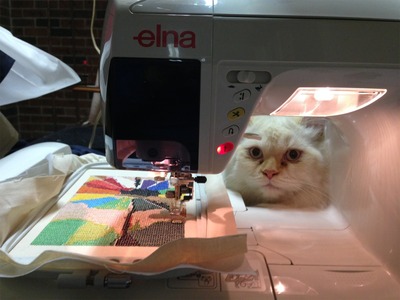
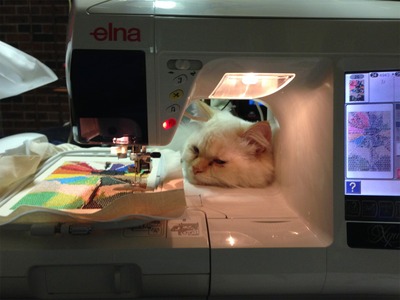
My own kitty in the machine. :-)
2 comments
Great pictures. Thanks for sharing. Shirley
Hi Mom...whatcha doing mom...okay let me inspect to see if you are doing this right...not so much it's gonna take my special paw and cat eyes to fix... LOL
1407✽
What a great idea! And lovely work. And... a wonderful cat :o)
1 comment
Thank you
13216✽
Gorgeous Job Meganne!! My question is... how do you keep Tao from swatting at your needle while it goes up and down? My Lexie (5 years old now) does that. I have to be very careful if she is around. OR not sew if she is around. Best sewing time is when she is napping. lol. ***FLOWERS to all***
1 comment
Oh I stop the machine as soon as he jumps on the table, then I have to lift him down as he is fascinated by the needle too. LOL!
Thanks for commenting.
Thanks for commenting.

20173✽
by
lindalee757
18 Aug 2014
+9✽
Look awesome Meganne-I LOVE the material you used. The embroidery designs are great-especially the sewing machine-love it!
1 comment
Thanks Linda

96370✽
by
dailylaundry
18 Aug 2014
+9✽
Thanks Meganne for all the pics (especially, your furry fabric weight!!) - I just love this project - I definitely need one under my EM!!!! Is it sandwiched with batting or lined? - I love the pockets and the designs you picked out!! Hugs, Laura*
1 comment
Thanks Laura, I have posted instructions above and again in Community Sewing. The section that goes under the machine has batting inside it and also inside the section that makes up the pockets. hugs n love, Meg

360672✽
Such a grand idea !!!
1 comment
Thanks Carolyn

11795✽
by
americangirl
18 Aug 2014
+5✽
Great job Meganne! I think I need one now too.
1 comment
Thank you, I can recommend how useful it is.
318619✽
66028✽
2819✽
by
pennydubose
18 Aug 2014
+5✽
Trying to see if I could make one by looking at yours as I don't have a pattern. I am going to do it and see what happens! Love yours. Hugs and blessings.
2 comments
Penny I have put the instructions at the top of this post and also in Community Sewing section. No pattern needed for something this simple but measurements should be helpful.
Thank you so much for your instructions!
21543✽

299709✽
what a super organizer for your machine! Well done Meg, ~hugs~**** 4 all
1 comment
Thanks Loralye

70772✽
Terrific project! I love all the designs you chose..... I've been meaning to make one of these for myself - seeing yours, I am totally inspired to make one very soon....
1 comment
Thanks Deb.
I allowed myself two days to make this, so I wouldn't sit up all night. Of course the embroidery took the longest so I was glad I chose a couple of line-work designs.
I highly recommend everyone having one of these, especially if they're anything like me and keep knocking their sewing tools on the floor. :-)
I allowed myself two days to make this, so I wouldn't sit up all night. Of course the embroidery took the longest so I was glad I chose a couple of line-work designs.
I highly recommend everyone having one of these, especially if they're anything like me and keep knocking their sewing tools on the floor. :-)

62461✽

52686✽
10973✽
very nice projet!
1 comment
Thank you
35301✽
Very nice, I think the three of you have issued the rest of us a challenge, to see if we can be as creative. Thanks for sharing! :-}
1 comment
OH absolutely Leaha, I'll challenge Cuties to make something for themselves, for a change.
It would be lovely see what everyone else comes up with. :-)
It would be lovely see what everyone else comes up with. :-)

158720✽
REALLY Nice. Did you just stitch down a cloth measuring tape. I lost my glasses while hiking in the mountains and can't really see well with my back ups.
1 comment
Thank Jerrilyn. Yes I cut up one of my many tape measures that has both Imperial and Metric because I am hopeless with metric so it should help a lot having a measure at hand.
23293✽
That is beautiful!!! Someday I will have to make one too.
1 comment
Thanks so much.
I'll lay down a challenge to you if it helps. :-)
I'll lay down a challenge to you if it helps. :-)
45918✽
Meganne, a very nice machine mat.. I'll have to give it a go, maybe for the daughters we are giving them all a machine each for Xmas this year and also my 9yr old grand daughter, my son has layed claim to my janome when I upgrade... Maybe I'll make this a sewing family yet! lol
1 comment
WOW, lucky daughters Marian. Perhaps you could help them make one each for their first projects, they are really easy to make.

23163✽
by
greysewist
19 Aug 2014
+2✽
This looks fabulous, Meganne. Great fabric, great designs and great fabric weight (as long as he kept still when he needed to and his tail didn't get accidentally shortened!). You girls have done a good job of inspiring each other -as well as lots of fellow Cuties!
1 comment
Thanks Marianne, I should make it a challenge shouldn't I?

234573✽
That is brilliant Meg. So happy to see it finished after all the pussy cat distractions you've had with it. I love mine and have to make one now for the Brother machine - I've got a free day tomorrow and Thursday so I'll see if I can finish it. Love Chris
1 comment
Yes I was really anxious to get it done and I am well pleased Chris. I used calico to back this one so I have enough fabric to make one more, but I'll use different designs.
hugs n love, me
hugs n love, me
122866✽
Instructions for making machine organiser.
We just cut two pieces of fabric 23" square
one piece of wadding 23" x 11" to insert into the top section where the machine sits
a piece of contrast fabric 23" x 11" folded over lengthwise making a strip 5 & 1/2 inches by 23" (for the pocket section)
one piece of wadding 23" by 5 & 1/2 inches to stiffen the pocket section
Step one, prepare the pocket section by folding over lengthwise, marking where you want the pockets.
Insert the wadding and stitch it onto the right side of the main front piece at the place where you marked the pockets.
Turn the front over to the wrong side and pin the (23x11") machine base wadding to the wrong side.
With the main front right side facing you, pin the backing to the front, right sides together and stitch a 1/2 " seam all the way around the whole square Leaving a four to six inch opening in one side, (between where the machine base lining ends and the top of where the pocket section starts).
Turn organiser right side out, finish off the opening then run a topstitch, 1/2 inch from the edge, all the way around.
Sounds more complicated than it is but I can tell you, once you have a sewing organiser under your machine, you will wonder how you ever lived without it.
hugs n love, Meganne
We just cut two pieces of fabric 23" square
one piece of wadding 23" x 11" to insert into the top section where the machine sits
a piece of contrast fabric 23" x 11" folded over lengthwise making a strip 5 & 1/2 inches by 23" (for the pocket section)
one piece of wadding 23" by 5 & 1/2 inches to stiffen the pocket section
Step one, prepare the pocket section by folding over lengthwise, marking where you want the pockets.
Insert the wadding and stitch it onto the right side of the main front piece at the place where you marked the pockets.
Turn the front over to the wrong side and pin the (23x11") machine base wadding to the wrong side.
With the main front right side facing you, pin the backing to the front, right sides together and stitch a 1/2 " seam all the way around the whole square Leaving a four to six inch opening in one side, (between where the machine base lining ends and the top of where the pocket section starts).
Turn organiser right side out, finish off the opening then run a topstitch, 1/2 inch from the edge, all the way around.
Sounds more complicated than it is but I can tell you, once you have a sewing organiser under your machine, you will wonder how you ever lived without it.
hugs n love, Meganne
2 comments
Thanks again for this info, I really appreciate it!
Thank you so much for the information! This is great!

5172✽
Aren't the designs on that site pirated :(
2 comments
Supposedly, but not all of the thirty thousand designs are pirated.
Besides that there is nothing stopping me from digitising it for myself as long as it is for my own personal use and I don't try and sell the designs to others.
So I could have lied and said I digitised it, but I won't lie for anyone, just as I won't digitise designs for others unless they have permission to use the artwork for the design they want.
Besides that there is nothing stopping me from digitising it for myself as long as it is for my own personal use and I don't try and sell the designs to others.
So I could have lied and said I digitised it, but I won't lie for anyone, just as I won't digitise designs for others unless they have permission to use the artwork for the design they want.
How do you know not all of them are pirated...I've been to that site and I would say that since most of them look familiar to me after doing machine embroidery for 18 years that I could comfortably say yes all of them are pirated. And I don't know what digitizing them yourself has to do with downloading pirated designs. Here's one of you designs from the original source.
http://www.loraliedesigns.com/collections/all-embroidery-designs/products/fancy-cats-embroidery-design-collection-cd
http://www.loraliedesigns.com/collections/all-embroidery-designs/products/fancy-cats-embroidery-design-collection-cd