


140723✽
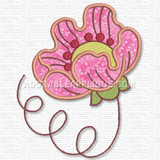
I'm working on some applique designs which I want to look hand stitched. My usual method of tack down, trim and finish does not look good without satin stitch covering the edges. So, I've been trying the method where the applique pieces are precut and held in place with bondaweb. I'm having great difficulty in getting the pieces accurately positioned, so, in places, the edge of the fabric is visible. Any tips to help me to improve?
Also, I really must get one of those tiny irons, mine felt so clumsy!
1 images:
[1]

Comments (10)

20463✽
do not know the quilt artist but she said, if you sit on a horse and ride by that quilt - and you do not see it - well than it is good enough 8-) hope you have a horse in reach to test your applique - btw nice design
3 comments
LOL!

I believe that this was Jenny Wilding Cardon from Martingale.

"A man on a galloping horse would not notice" is a great saying in our family

145307✽
I like the handmade look.
Did you use a placement line? You can then place your precuts exactly on that line. I use a glue stick to hold them in place and fuse afterwards.
Did you use a placement line? You can then place your precuts exactly on that line. I use a glue stick to hold them in place and fuse afterwards.
3 comments
I did use a placement line, but found it difficult to place the fabric even with this quite simple shape.
Try using a bamboo skewer to help place the appliqué.
Use the skewer to either push the fabric into place or to hold it in place as you iron or finger press if using a glue stick.
Once you have covered the placement lines and it has had a minute to sit and set, then start stitching.
The very first one of these I did was with the word Hope - lots of little bits - but it turned out perfectly and so will yours. I think the sit & rest part is important as the glue seems to stick more after a bit than what it does at the start.
Use the skewer to either push the fabric into place or to hold it in place as you iron or finger press if using a glue stick.
Once you have covered the placement lines and it has had a minute to sit and set, then start stitching.
The very first one of these I did was with the word Hope - lots of little bits - but it turned out perfectly and so will yours. I think the sit & rest part is important as the glue seems to stick more after a bit than what it does at the start.
The skewer sounds a good idea - saves steamed fingers!

92391✽
I think this looks Great!!! Looks a lot like what I used to do by hand, & I think that was your intention? Hugs, Judy...
1 comment
It was indeed!

318615✽
by
dragonflyer
23 Jan 2015
+6✽
I like the hand look, too...and the tiny irons really help out..but a glue stick will keep in in place until you can iron it down out of the hoop...
18403✽
Would it help to cut the shapes just inside the placement line?
1 comment
I may try that
213✽
by
Patricia103
23 Jan 2015
+4✽
I love this shape. Have done heaps of them - paint, embroidery and applique. It looks good. Left a tip as a comment to another comment and your response in a previous comment.

14995✽
would useing very fine iron on interfaceing to just give a bit of stiffness to the design help you to keep the shape. sew placment line and trim then use the machine blanket stitch to hold all in place.
even with hand sewn applique you get the bits on the edge and the will wear off so I realy would not worry too much about it.
even with hand sewn applique you get the bits on the edge and the will wear off so I realy would not worry too much about it.
2 comments
you could also place the iron on interfaceing onto the fabric and not iron on but sew outline and then trim and just snip a small hole in the back and turn inside out so that the bond side is now on the outside ready for you to iron in place by turning there will be no raw edges and you can iron into position and the bonding will hold it in place ready for machine sewing
Trust you to think outside the box!
I like you second suggestion but I'm afraid it wouldn't work for a machine embroidery design.
I like you second suggestion but I'm afraid it wouldn't work for a machine embroidery design.

33350✽
by
baydreamer
24 Jan 2015
+2✽
The raw edge will not stand up to washing if you don't use a product like steam a seam. We are not prefect , so the only way to get them right is if they are precut with Cricut. Skeldales House , like a few others offer designs that have been cut using one of these machines.

173695✽
Love your thinking! I saw this when making your hats. It does not look bad to me and a washing or 2 will make the edges disappear.
2 comments
do not get the ergonomic iron it will not fit either.
Thanks!
140723✽
After much trial and many errors, I have discovered that my travel iron fits into even my smallest hoop. I should be on a roll now!